Compile custom kernel on Ubuntu 10.10
First off, you want to grab the latest kernel source from http://kernel.org/ and save it to a folder on your computer. I used my browser’s default : ~/Downloads. Right click on the archive and select “extract here”
Configuration
Open a terminal, “cd” to your source directory, in my case cd ~/Downloads/linux-2.6.37 and run make gconfig if using Ubuntu or make kconfig if running Kubuntu. At that point, you’ll need to know a fair bit about your system’s hardware, to select only the options that are applicable. I like to reuse my current config as a starting point, so if you are using the default ubuntu kernel, the configuration used is stored in the boot directory, with names like config-2.6.35-24-generic
Copy the latest one to your linux source directory. When the configuration editor is loaded, choose File >> Load and select the file you just copied over. Now the Ubuntu default configuration is loaded. If you were to compile your kernel you would get the same kind of system you have now : functional but suboptimal.
We’ll try and better that a bit.
The first submenu I open is Processor type and features. In there, I disable everything related to SMP and Paravirtualized guest support as I do not plan to run this as a VM guest. I choose the type of processor appropriate to my machine, in this case “new Xeon”
You can use make localmodconfig which will disable all the modules not currently loaded from your config file. Be careful though, because if there are devices and/of file systems you’re not using at the moment, the drivers won’t be added.
Compiling and instalation
Once you’re happy with the configuration, save and close the editor, and run make all or make -j4 all on multicore processors to run several processes in parallel, which will compile the kernel and the modules specified in the .config file
That’s the regular debian method, in which you have to run mkinitrd afterwards. I ended up doing it the ubuntu way, where you create .deb packages you can later install with your preferred package manager.
If you re-used the existing configuration, note that Ubuntu kernels build with debugging information on, which makes the resulting kernel modules (*.ko files) much larger than they would otherwise be. To turn this off, go into the config’s “Kernel hacking” and turn OFF “Compile the kernel with debug info”.
Now you can compile the kernel and create the packages:
    make-kpkg clean # only needed if you want to do a "clean" build

    fakeroot make-kpkg --initrd --append-to-version=-some-string-here kernel-image kernel-headers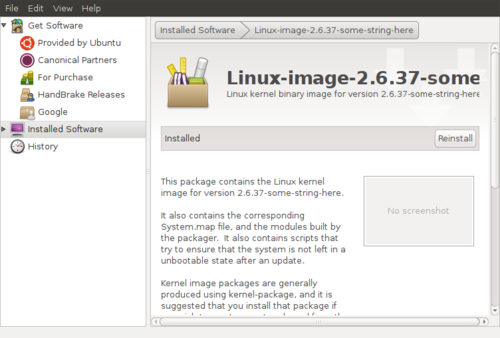
Much easier…
Drivers
Of course, if you’re using non-free drivers, you’ll want to reinstall them. The first time I booted the new kernel, X did not start because it couldn’t load the nvidia kernel module. Luckily, I had the latest driver around from a previous install, so installed straight away from the command line.
You should now have a working Ubuntu install running your own custom kernel. Of course, you are responsible for upgradin kernel and binary drivers, as the updates from Ubuntu are not going to work any longer… Although I’m not so sure about that. I’ll see in a while I guess.
Done!
Anyway, in my case this upgrade is really worth it because I get a functioning built-in microphone on my Vaio! Yay!
So the moral is: don’t be scared of trying a custom kernel, it really got much easier, and if you don’t like it, going back is as easy as selecting another entry in grub…